Showing posts with label how to.... Show all posts

Monday, January 30, 2012

An Old Easel


First things first!

This last Wednesday, I spent the day with my twinsie and with my parents. It seems as though there is never the time to just meander out for the day, but sometimes, you just have to go and leave things!

Over lunch, I reminded my momma of a devotional she had read to me awhile back. For those of you who know my momma, she loves to share letters she has read, funny stories, Bible verses, a chapter of a book she is reading etc. When she read this one to me awhile back, it just stuck with me and I wanted to share it with YOU today.

It is a reading from JESUS CALLING {December 18}

"When you are plagued by a persistent problem---one that goes on and on---view it as a rich opportunity. An ongoing problem is like a tutor who is always by your side. The learning possibilities are limited only by your willingness to be teachable. In faith, thank Me for your problem. Ask Me to open your eyes and your heart to all that I am accomplishing through this difficulty. Once you have become grateful for a problem, it looses its power to drag you down. On the contrary, your thankful attitude will lift you up into heavenly places with Me. From this perspective, your difficulty can be seen as a slight temporary distress that is producing for you a transcendent Glory never to cease!" {Isaiah 30:20-21 & 2 Corinthians 4:17}

How encouraging is that for a MONDAY morning? Perfect way to start off the week, don't you think?

********************************************************************************************************************************

Okay, on to my "dumpster diving" hubby. It really wasn't a dumpster, but it wasn't the most pleasant place to dig through either. Let's just say it was a far cry from POTTERY BARN and leave it at THAT.

We were going to make our own easel, but when he found this one, we decided we could give it an easy makeover with one package of beadboard and some to spare. :}


The old chalkboard from one side was taken off and the white board from the other was also removed.

He put new supports across the back and then decided that we really didn't need them. POOR thing...


The beadboard was put on to measure for size...and because I could NOT wait to see what it was going to look like! {usually, you would just measure the width and not put the board up!!}


The end pieces were cut off...and saved for mini easels that I will use for menu boards!

Then, we put the cut pieces of beadboard up and screwed them in. For less than $12, we have a one-of-a-kind easel...and fun memories, too. We are nerdy like that...I guess, since We LOVE doing projects together!

I think my favorite thing about the easel is the boxes below...for the baby shower this weekend, they will house the party favor boxes and some birch branches to go along with the birdie and flower theme.


There are so many more ideas for the boxes, though...mason jars filled with candles, fresh flowers in canning jars, markers and crayons for signing one BIG card and the list goes on...what would you put in the boxes?

I still need to decide if I am going to paint the whole thing white or leave it a bit shabby...leaving the frame black. It really comes down to time and laziness!
The beadboard was put on to measure for size...and because I could NOT wait to see what it was going to look like!


there are so many more ideas for the boxes, though...mason jars filled with candles, fresh flowers in canning jars, markers and crayons for signing one BIG card and the list goes on...what would you put in the boxes?

I still need to decide if I am going to paint the whole thing white or leave it a bit shabby...leaving the frame black. It really comes down to time and laziness!


Monday, October 10, 2011

French Theme Week: Pretty Parisian Posies


As women, most of us LOVE our homes and have the desire to create a warm and relaxed atmosphere...but as we all know, that is way easier said than done. We are easily distracted by LAUNDRY, dishes, messy garages, pantries that are so stuffed to the brim with coupon finds and bulk bags of food with twist ties lining the pantry floor, couch crumbs from movie night cheesy popcorn and gnarled up hand braces that have been salvaged from a hungry dog...however,it IS possible to take a few minutes to freshen up our homes with pretties!

Vintagy Posies:

A small bit of burlap...I had leftovers in the garage.

Leftover fabric...I used leftovers from when my curtains were hemned

*If you don't have fabric sitting around, you could purchase a pillowcase at the thrift store and not feel bad about cutting it up...pretty napkins work, too.

A glue gun

Twine...Still leftovers from Grammy's stash


{DIRECTIONS}

Cut circles of fabric. Not perfect. Just eyeball it. You want them to be a bit shabby looking.


You will nedd three fabric circles for each posie and one burlap circle pinched in the middle and tied for the "leaves".


Take each circle of fabric and fold into half. Pinch it together to form a bud, and then glue gun it. Once you have all three buds done, nestle them together and glue gun. Then glue gun the bud to the burlap leaf. OOOH LA LA. Perfect for everyday or simple enough for le bebe shower in Autumn!

Here are a few things I did to add a bit up Parisian charm to our HOME for our French Theme Week.

{They will also serve as simple decorations for a family birthday party!}

If all else fails and you've had a hectic day, find your local classical station or tune it in on PANDORA, light a few tea lights and serve store bought French onion soup with a bag o' salad and a fresh loaf of warmed Artisan bread. The dust wont show and you may just feel like you are in Paris for the dinner hour!


Happy Monday!


Shared with: freckled laundry

Tuesday, July 12, 2011

Burlap Baby Growth Chart


Well, hello girlies! Hope you all are doing just peachy!

I know...I have been doing lotsa blog archiving lately...because it is summer time and there is fun to be had!!!

Not sure if it is just here in Oregon, but everybody {ALMOST!} is either pregnant or have just had a baby. We know of nine as I type!

SOOOO, I wanted to do something a bit different because I am getting bored with the same ol' projects and that is NOT good. Baby showers are so much fun to go to and making gifts...if you have the time...can be really fun, too!

I saw the cutest baby gift in a boutique, but I felt like it was outrageously priced, considering the materials it used. SO, I decided I could make a very similar one for pennies! And, YES! I used change to purchase the burlap! :}

So, with my craft store coupon {yay for the 50% off ones!!!} and what I had on hand...each gift will cost me about $2! I love it!

Here is what you will need to make it yourself {MIY}:

Burlap...I bought what was left on the bolt...about one yard and 2/3, I think
Just make sure you have enough for 4 foot lengths.

a bit of decorative ribbon

1 wooden dowel

glue gun

20 safety pins

cardstock paper and a decorative punch

embellishments and gift box or bag

Directions:

*Cut burlap as staight as possible...4 feet in length by 6 inches in width

*iron fabric so it looks a bit more chic than shabby {only if you like!}

*fold burlap over wooden dowel and glue gun it.

*for a boy you may want a knot out of your decorative ribbon on each side of the dowel...and a bow if it is a baby girl.


*print "name" "age" and "date" on cardstock. I did mine on the computer and then cut each tag out with a punch. Make 20 so there sre plenty for the new baby.

*punch small holes with a hole punch into each tag, so that they can be pinned to the growth chart. I wanted to make things more complicated, so I used metal reinforcers for the holes!!! No need to do this! {I broke my own rule of keeping things SIMPLE!}


*the safety pins can be gathered and placed into a small envelope or spice bag with a drawstring. TAA DAA!


I will be using a growth chart tag for the outside of the gift...just for fun...since babycakes is not born yet, I will be putting down the due daye and age will be how many weeks momma is at the time of her baby shower.

Directions that will be included in with the gift:

Place growth chart 1 foot or more from the floor...Enjoy documenting the growth of your child. Simply roll it up and keep it safe when your child is done growing!

I think this will be a special gift!

Shared with: at the picket fence, crafty scrappy happy, overflowing, talent tuesday

Tuesday, July 5, 2011

Screen Door Frame


AHHHHHH, Summer is HERE! YES!YES!YES! We have been having so much fun. A ride-along last night with my hubby was an unexpected adventure to say the LEAST! He is my knight in shining armor! I have a deep appreciation for those firefighters who are willing to put their lives on the line at any given second!

Caleb is in Alaska and our home has been bustling with our daughter's friends that are so much fun to be with. Let's see, this morning they made pancakes for us, Lauriss washed her daddy's car and then we had the most delightful water fight! I finally got Lauriss when she least expected it...and she got me right back when I least expected it...IN THE HOUSE!


All that to say...don't you love summer? It is the light breeze in the trees, the warm deck wood on bare feet, the smell of dirt that has been watered to keep the plants happy and the fountain filled to the brim with fresh water for the little birdies who adore their morning bath!

Not sure why I love screen doors, but I do! Not the metal ones, but the old wood ones that creeeek and squeak! Maybe I watched too many episodes of the Waltons...but I always imagine my hubby and I in the South sippin' on lemonade...late into the night out on a moonlit porch...taking in the last bit of a long day. We would kiss goodnight...open the screen door and let it close behind us...only to do it all over again the next night!!! BUT, since there is something called reality I decided to make a frame so we can be reminded of a dream that might just be a reality one day! If not here, I am pretty sure there will be squeaky screen doors in heaven and lemonade!

how to...make a screen door frame: {an old Mary Engelbreit craft idea}

Materials:

a frame

two knobs...I used flat bottomed glass knobs

two screw eyes

a staple gun

a glue gun

screen mesh material {This is going under "frugal" because I got the mesh for $2 from Home Depot because it had been opened! YAY!}

embellishments...sea shells, clothespins, ribbons, wire etc...

Directions:


1. Remove glass and metal flaps {that keep glass in place} from frame.


2. Paint your frame


3. After paint is dry...be patient!!! you will want to staple screen mesh to the back of your frame.


4. Then you will want to embellish. Screw in the screw eye hooky thing-a-ma-jigs and get creative from there. Last but not least: glue gun the glass knobs to the bottom. THAT IS IT!


Shared with: tip junkie, our simple country life, raising homemakers, wow us wednesday, made by you Monday, at the picket fence, tidy mom, not so simple housewife

Thursday, June 30, 2011

Condiment/Tea Light Swing


One advantage to being married to my handy dandy hubby is all the fun projects we get to do together! One advantage to having a son who loves rope, twine, tape, tools etc. is that there is always "stuff" around the house to use!

My hubby is thrilled that I am cleaning up the scraps of home improvement materials...shoved into every nook and cranny available out in the garage and I am thrilled that he is helping me make something useful and pretty!

Since we didn't have enough time to go berry picking before his PT appointment {remember he wiped out on the dirt bike????} we decided to make a condiment swing for our next BBQ. Right now it is home to tea lights {We ran out of IKEAS BIG ONES!}. I took half-pint canning jars and hot glued manila twine around the tops...to add a bit of a rustic feel to break up all the white in the kitchen. They were glued to two slabs of WAINSCOT and threaded with manila rope to give it the look of a swing!

For the BBQ, the jars will be filled with ketchup, mayo, mustard, relish, and BBQ sauce. Having it hover above the food will give us a bit more room for food and it will be something a bit different! It may be fun for a salsa bar, too. Endless possibilities for entertaining. FREE IS A VERY GOOD PRICE!


I am almost out of WAINSCOT, so the projects are almost done...unless I find someone who is getting rid of their leftover scraps! JUST KIDDING, honey!

HOW TO...

1. Lay out 2 planks of wainscot.


2. Lay out half-pint jars and mark where you want them to be glued to the plank.


3. Make sure you have good, strong, durable rope to hand your candles. THIS COULD BE A FIRE HAZARD!


4. Glue gun planks together. Make sure the primed boards are on the outside. One on the top and one on the bottom.


5. Cut lengths of rope and glue gun to the necks of the jars.


6. Drill holes in allk four corners. Measure to make sure your swing hangs level and even!


7. Thread rope through the holes on your plank with the rope supporting the bottom board...just like a swing! It will give it a bit more support.


8. Once your swing is level and hanging in place, glue jars to the plank and enjoy!

I think I may even use these as vases!!!


Happy Thursday!

Shared with: not so simple housewife

Tuesday, June 21, 2011

Wainscot Menu Board...sneak peak


Chalkboards, menu boards, signs of any kind are so much fun to have around your home. They really add a homey touch...a bit of life that expresses who you are as a family! The one in our bathroom is for communication, the one in the kitchen lets everyone know what's for dinner and the one out on the deck is JUST FOR FUN...but has also been used as an outdoor menu board.

This weekend, I am hosting a bridal shower with my mother-in-law...that in and of itself will be one BIG party! Anyhoo, our family menu board is too small for all.the.food to be listed and the one outside is already spoken for....soooo, I found some old wine crates at the thrift store and when I went back with my coupon {my hubby had them in his car from our last donation!!} they were gone. Girls...sometimes penny pinching is not a good idea...SOOOO, PLAN B. We still had some Wainscot boards left from our bathroom remodel.

I am still not quite finished with the project...I still have menu items to add... but I already can't wait to hang it right behind the serving table!

I may just keep the same menu for the next few brunches, or it will be easy to slap on a fresh coat of white paint and stamp on the letters for the next party.

And if you are lucky enough to have a clean garage that isn't housing home improvement leftovers, a package of Wainscot is less than $12! Still not bad for a sign. The menu can just be written on with a sharpie...easy peasy!

"How to" make a menu board:

1. Decide if you will be using stamps and an ink pad or a SHARPIE pen for the letters...you could use a brush and paint, also.


2. Decide if you want to age the boards a bit. I took a bit of water on a rag and took a bit of the primed paint OFF. I also sanded it down to give it an older look.


3. If you are using letters, line them up alphabetically to speed up the stamping project.


I can't wait for the trim, the yellow ribbon, the monograms etc. I'll post it along with the shower pics...if I don't forget to take them! :}


POST EDIT:

Here it is! I decided against the monogram on the board and hung it above the kitchen island instead. I LOVE it!

Next project: Making another wainscot menu board and painting it with chalkboard paint! Some of us need the grooves as lines to keep our letters straight!!

After the sign is made, attach wainscot to a thin piece of plywood...cut to size. Some home improvement stores will do this for you.

Cut trim pieces and attach with liquid nails. Drill holes and thread with pretty ribbon. Change ribbon to fit the occasion!


Happy Tuesday!

*4th of July free printables from DIVINE TWINE

Shared with: simply homemaking, women living well, tidy mom, making the world cuter, titus2sday, TLC how to..., domestically divine

Wednesday, March 30, 2011

Paint Storage Organization {how to...}


{before}


{after}


It has been at least 16 years that I have put this project off. That is major procrastination! And you know what? It took less than an hour to get it done. Maybe I should have baked one less dessert or dinner or skipped a load of laundry somewhere over the years.

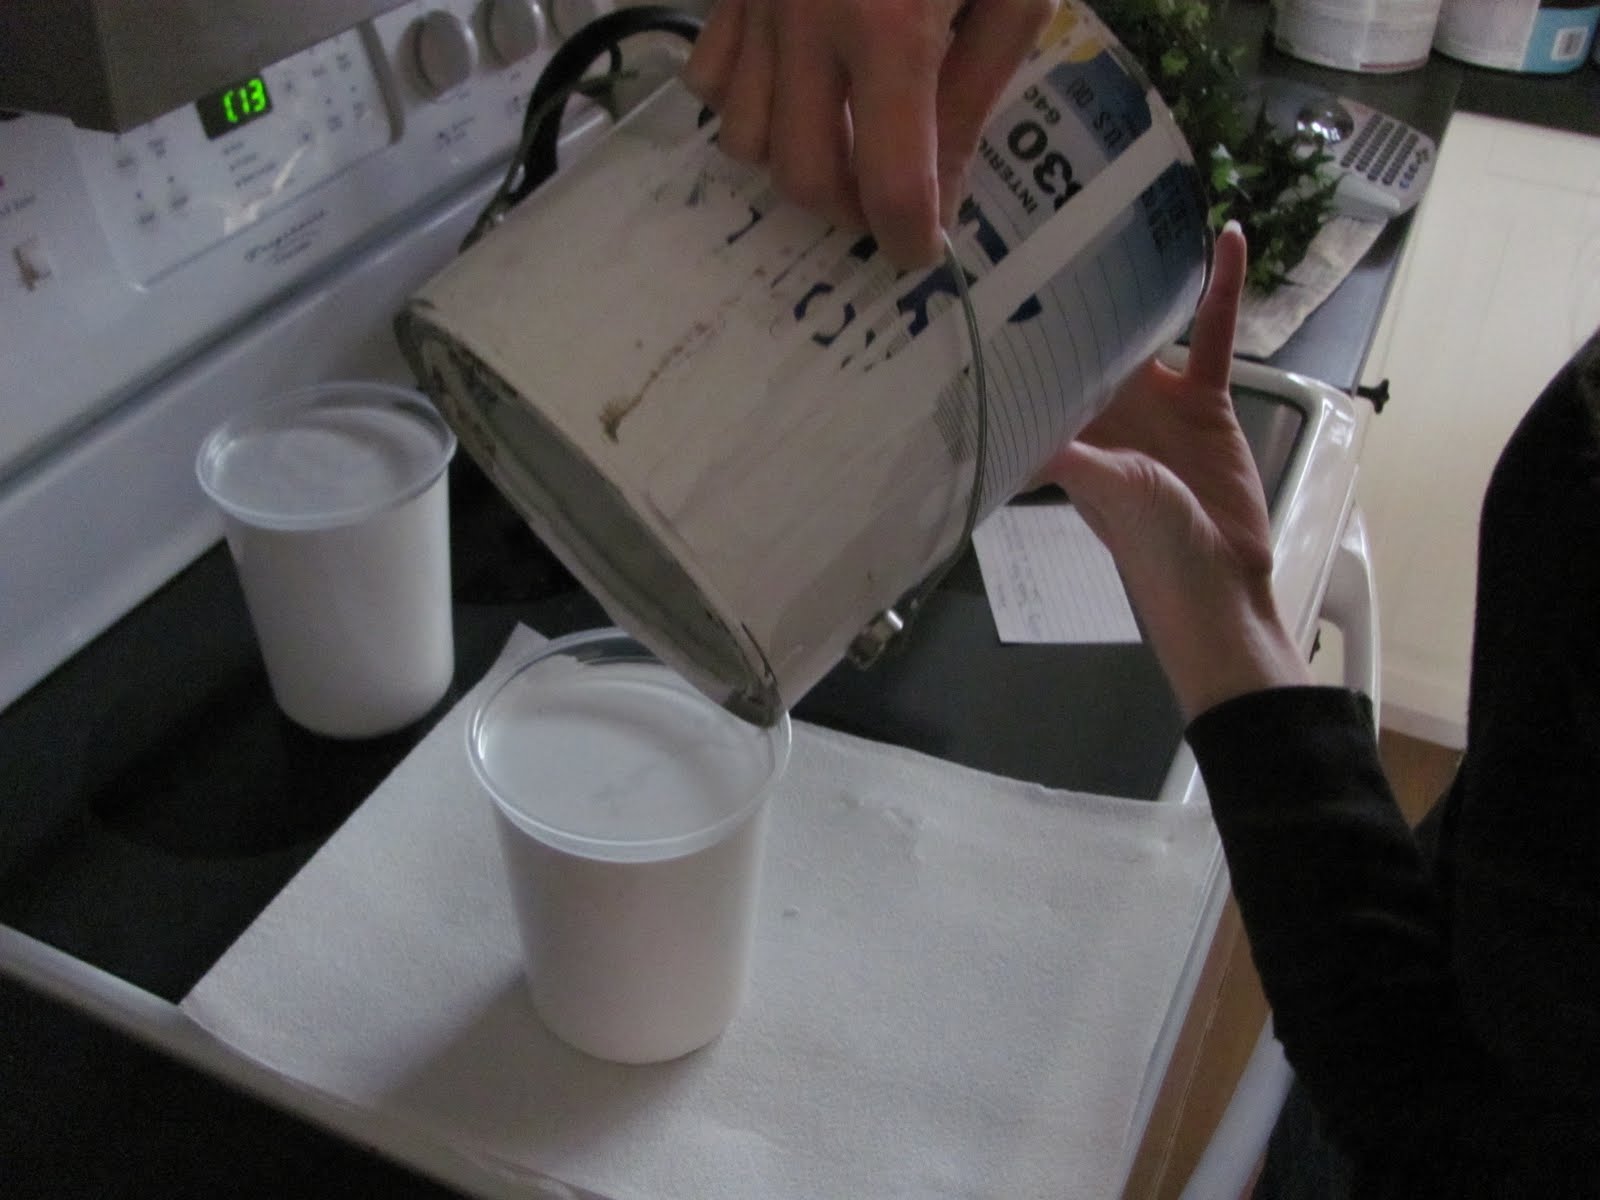
Please tell me I am not the only one that has had issues with nasty, dirty, bug- infested, rusty, old paint cans. PLEEEASE! Wanna know the straw that broke the camel's back? We had paint cans all over including ones that were stuffed under my hubby's work bench. I needed a color to touch up some spots. No, it wasn't in the closet or anywhere handy. It was jammed way behind the work bench. I have no idea how we got them under there because of the lip on the bottom shelf. Anyhoo, I had to use a rubber mallet to bang it out at an angle. Now you know why I had to get this project done ASAP.

Here is the tutorial: {fancy schmancy name for how to...do it!}

What you will need:

*a label maker, a sharpie pen, or adddress labels

*mason jars and platic screw lids OR clean plastic food storage containers {Cash and Carry}

*free paint stir sticks...Home Depot gives them to you!

*3x5 index cards

*an envelope to keep 3x5 index cards in

*hanging file folder for your files


Directions:


1. Stir paint thoroughly with stir stick and pour into new container.


2. Make label for top of paint container. If you are over 40, Do this right away! You don't want to forget what is what...unless you are only doing one can...then you shouldn't have a problem. :)


3. Take a 3x5 index card and write down all of the paint info. Where you bought it, color code, type of finish ie. satin, flat etc. If you are super organized, you could staple the info to a card. File the info away into an envelope.


NOW, that you are all oganized or thinkin' about it, be sure to do this every time you get new paint. It will make your hubby swoon and it will keep your knuckles from bruising up the next time you are digging for "that color"!


GOODBYE, NASTINESS!


HELLO, little beauties!


Happy Spring Cleaning to YOU!

Linked to:

Tidy Mom


, at the picket fence