Monday, February 20, 2012

Have You Seen Jesus?


Yesterday’s sermon ended with the question, “Have you seen Jesus?  Do you know Him?”  I thought to myself.  Of course I see Him and yes, I do know Him.  But do I really see Him?  Do I really KNOW Him?
I will be the first to admit that life gets busy and I can easily make time for Him…sometimes rushed…just to check it off the “to do list”.  Priorities get all tangled up into one big mess and what was once most important takes a back seat while what has no business being labeled as urgent seems to take front and center.
Do you ever take inventory and shake your head in shame and wonder how you slowly let God become more like a faithful friend you know will always be there for you?  The kind of friend you don’t necessarily need to keep up with, but when things turn sour and overwhelming…you know without a doubt whatever time of day or night, whatever the circumstance may be they will drop everything and be there for you?
Well, guess what…yes, He is there, but oh how sweet to KNOW HIM.  To be able to share every thought, every fear, every miracle, everything with YOUR Heavenly Father who created you just the way that you are and who delights in YOU.

So, this week I am hoping that YOU will take time to LOOK for HIM and to KNOW Him…

Mary Magdalene went to the disciples with the news:  “I have seen the Lord!”  And she told them that He had said these things to her.   John 20:18
 It was in 1912 that music publisher Dr. Adam Geibel asked author and composer C. Austin Miles to write a hymn text that would be “sympathetic in tone, breathing tenderness in every line; one that would bring hope to the hopeless, rest for the weary, and downy pillows to dying beds.”  Mr. Miles has left the following account of the writing of this hymn:

  One day in April, 1912, I was seated in the dark room, where I kept my photographic equipment and organ.  I drew my Bible toward me; it opened to my favorite chapter, John 20---whether by chance or inspiration let each reader decide.  That meeting of Jesus and Mary had lost none of its power and charm.
  As I read it that day, I seemed to be part of the scene.  I became a silent witness to that dramatic moment in Mary’s life, when she knelt before her Lord, and cried, “Rabboni!”
  My hands were resting on the Bible while I stared at the light blue wall.  As the light faded, I seemed to be standing at the entrance of a garden, looking down a gently winding path, shaded by olive branches.  A woman in white, with head bowed, hand clasping her throat, as if to choke back her sobs, walked slowly into the shadows.  It was Mary.  As she came to the tomb, upon which she placed her hand, she bent over to look in, and hurried away.
  John, in flowing robe, appeared, looking at the tomb; then came Peter, who entered the tomb, followed slowly by John.
  As they departed, Mary reappeared; leaning her head upon her arm at the tomb, she wept.  Turning herself, she saw JESUS standing, so did I.  I knew it was He.  She knelt before Him, with arms outstretched and looking into His face cried, “Rabboni!”  I awakened in sun light, gripping the Bible, with muscles tense and nerves vibrating.  Under the inspiration of this vision I wrote as quickly as the words could be formed the poem exactly as it has since appeared.  That same evening I wrote the music…

I come to the garden alone,
While the dew is still on the roses,
And the voice I hear falling on my ear,
The Son of God discloses . . .

And He walks with me, and He talks with me,
And He tells me I am His own,
And the joy we share as we tarry there,
None other, has ever, known!

He speaks and the sound of His voice,
Is so sweet the birds hush their singing,
And the melody that he gave to me,
Within my heart is ringing . . .

And He walks with me, and He talks with me,
And He tells me I am His own,
And the joy we share as we tarry there,
None other, has ever, known!

SOURCE:  AMAZING GRACE by Kenneth W. OSBECK

Friday, February 17, 2012

Baby Felt Shoes


Happy Happy Friday!

This never has been a *sewing* blog and I think it is safe to say it never will be, but these little baby booties {I can't bring myself to call newborn shoes *shoes*.  Anyhoo, that is what they are listed under...so I guess that is what they are called.} are so much fun to make and I think they are adorable!

About a month or so ago, I asked my bff what I should make for baby gifts.  I was getting a bit tired of the old standard. When you are making handmade gifts...you want to look forward to making it and enjoy every drop of hot glue or, in this case...every stitch!  These darling little shoes were her suggestion!  I am so happy to have a new go-to for all these new little babies!  Spring is in the air!

I had made felt shoes before, but this pattern seemed to be much easier!  Yay for simplicity in the sewing world!

And if you are looking for an inexpensive gift to make this will be just perfect for you.

I had the felt from these little pea pods and some scrap fabric from baby pants Kim taught me how to make.  I think you could make this gift for less than $5.

Here is the pattern from Purl Bee.  You can make them simple or use your imagination and add to them.  I wanted to make little posies to match the baby pants...so I just stitched a few roughly cut circles and sewed them on well.  You do not want anything frilly being a choking hazard!

For the packaging:

1.  Take a little white cupcake box {I always buy white, so that it can be decorated with whatever might go with the theme!} and cut a sheet of scrapbooking paper to size for the top of the box.


2.  You can print out the name of the baby, print a monogram, or the name of the baby to go across the box.


3.  Embellish with whatever you may have on hand...even if it is a twig from the yard.  I had some diaper pins...so that is what I used.


4.  If you aren't sure how to stitch:  first of all, I LOVE YOU, and if I can figure it out anybody can.  I simply looked up blanket stitch up on YouTube and watched the tutorial about a million and one times again since I always forget how to to it.  :}


I promise next week will be a bit less PINK!  OH.MY.GOONESS!  I was perusing this last week looking for a link and our bloggy looks as if it has been bathed in Pepto Bismol!

Enjoy your weekend!


Shared with:  freckled laundry, at the picket fence, bowl full of lemons, pink saturday, how to nest for less

Wednesday, February 15, 2012

Homemade Syrup and Clear Jel Jam


I think little condiments set out on the breakfast table are OH.SO.ADORABLE. It is always a surprise to see what will accompany Saturday morning pancakes, waffles or crepes. Here are two things that are staples in our home. It takes a little planning ahead, but it is a healthy alternative to the cost of spendy natural jams and syrups.

Growing up in Europe, syrup was not readily available, so our momma would make it.  It was sooo good.  It wasn't until we were older that we had the thick store-bought kind and teased our poor momma about her watery syrup.  Well, thanks to Instant Clear Jel...we have the best of both worlds...the thickness of processed and the goodness of homemade.  I so hope my twinsie does not rat me out on this post.  Laur...don't even!!!!


Homemade Syrup...that would make Aunt Jemima and Mrs. Butterworth SWOON!

Ingredients:

1 cup sugar

1 cup brown sugar

1 Tbsp. Instant Clear Jel

1 cup fresh cold water

2 Tbsp. Organic Blue Agave Sweetener {Trader Joes}

1 Tbsp. pure vanilla extract...you really want the real stuff.  Trust me.  :}


Directions:

Place sugars and Clear Jel into medium saucepan.

Stir to mix ingredients.

Add 1 cup fresh cold water

Add agave sweetener.

Stir until sugars dissolve.

Add vanilla.

Bring to a boil.

Let boil for 1 minute.  Make sure your saucepan is big enough.  Burnt sugar is nasty clean off your stove top!

Remove saucepan from heat and let cool.  Store in the fridge.

{Strain to remove any lumps of Clear Jel.  I rarely need to do this...but you may need to if you want it totally smooth}

No HFCS and no preservatives...

Serve and Savor!


Clear Jel Freezer Jam

Put six mini{8oz.}Mason Jars through the dishwasher. After the drying cycle, set jars right side up on a clean tea towel.

Ingredients:

6 cups berries {Costco has the large bags of frozen berries that work GREAT}

1 1/2 to 2 cups sugar

6 Tbsp. Instant Clear Jel {available through King Arthur or at the Decorette Shop}

Directions:

Place berries in large bowl and mash away...I LOVE THIS!!  {I use my BIG INDUSTRIAL SIZE IKEA POTATO MASHER}

Mix sugar and Clear Jel together.

Add sugar mix to berries...mash until sugar is dissolved.

Let sit for about 15 minutes

Take a one cup measure and scoop into mini jars, seal and freeze.
There will be just a tiny bit left to enjoy on a warm piece of toast or to put in a homemade berry milkshake!

The best thing about this jam is the fact that there is no YUCKY gelatin in it.  My friend's hubby was using gelatin in bow-making this week.  Perfect for alot of things...but I personally can not think about it in food.  I know.  I have issues...  :}

Enjoy!

For clear jel info:  food safety...and while you are at it you may want to look into how gelatin is made.  :}

Happy Wednesday to YOU!!!


Shared with:  comfy in the kitchen, newlyweds

Tuesday, February 14, 2012

Sweetea Pies & Pies on a Stick


Happy Valentine's Day to YOU!

Today, we are talking about the much-overlooked pie. In my opinion, cupcakes have taken over and they need to share the spotlight...just a bit. I love cupcakes, but sweet pies are equally as adorable and yummy...and there is way way more to a pie than chocolate cream and lemon meringue.

So, if the word "pie" paints an I LOVE LUCY episode in your mind, not to worry! You only need four or five ingredients. And no need to surf the net for the perfect pie crust recipe, either. Aren't you excited?

I am also listing this under Simply Frugal, because you get a lotta bang for your buck. With the price of butter and the fact that food prices continue to soar, I think pre-made is more economical to buy. {Not sure about you, but my kitchen looks like a tornado hit by the time I am done making my own dough. OKAY! Done justifying store-bought versus homemade! {Homemade is still best...in most cases!}

This is what you need:

1 box of Trader Joe's Pie Crust {It is truly as flaky and yummy as good homemade dough should be if you have figured it out...I think I am DONE trying!}

Favorite jam

Vanilla ice cream or whipped cream or BOTH

one egg, beaten...for Pies on a Stick

Coarse sugar for dusting your Pies on a Stick


*Directions for Sweetea Pies:

Cut small rounds out of dough using a cookie cutter {I used Demarle Products}

Press into mini pie pan

Fill almost to the tippy top with jam.

I baked mine at 450* for 12 minutes...and they did not burn.  Which always a big deal around here.

Serve with a small scoop o' ice cream and top with whipped cream!


*Directions for Sweetea Pies on a Stick:

I used a small heart-shaped cookie cutter and cut out dough hearts {I rolled the dough out just a bit.}

Then place a tiny bit of jam in the center.

Place another  heart dough cut out on top.

Using the tines of a fork, crimp the edges.

Brush with a tad bit of beaten egg {I dusted mine with coarse sugar, because it sparkles!}

Place lollipop stick up through the bottom and bake @450* for about 7 minutes or until baked and golden. THIS is just a suggestion. My hubby would die if he knew I was suggesting anybody be putting paper into a HOT OVEN. I need to experiment on the next batch with insering the lollipop sticks after they have been baked.

Enjoy!

For gifting:

Place mini sweetea pies into cupcake liners. Place into Cash and Carry Bio Box. Use baker's twine to tie around the box and don't forget a card!

You may want to include a small pint of vanilla ice cream.


REASON FOR THEIR NAME: This time it is not a spelling error. Sweetea is spelled with an "ea" because they are just the right size to be enjoyed with a cup of tea! :) No need to diet...everything in moderation, right? SOOOO, you can have your pie and eat it too!

SHORT ON TIME? Forget about the sticks and enjoy cookeas. YEAP! Little bites of yumminess that tastes just like a pie!


Shared with:  bowl of lemons, newlyweds, comfy in the kitchen

Monday, February 13, 2012

The Labeled Home

Happy Monday!

I hope you all had a great weekend!  Our weekend was relatively quiet compared to the past few weekends!  The urge to start planning spring picnics and taking walks around old neighborhoods up by the zoo, more trips to the beach and to the waterfalls are just around the corner!

I really have no blogging today, but the house is ready for the girlies tonight, laundry is going, and the boys will be gone for the afternoon and evening...so I am going to blog about LABELS!

I was thinking this morning HOW blessed we are with our smaller home.  While there have been times I have wished for a larger HOME, I am grateful for the way God has provided for our family.  And while it can sometimes be a bit tricky to figure large get-togethers, parties, and entertaining...I have enjoyed the challenge of making it work with what we have.

You learn how to organize and keep only what is necessary {my hubby would disagree with this...but for those who enjoy crafting...you know what I am talking about!}.

One thing that has helped us out so much is labeling things.  It really does.  There is no question where things belong.  This helps eliminate piles of messes all over the home which can quickly make a small home feel even smaller and cluttered!

I snapped a few pics that might be fun for you to use somewhere in your HOME!  Even if the labels are not really needed...it can add a bit of whimsy to an otherwise boring space.  There is no need for a label maker either.  Scrap paper, pens and a hole punch will do the job just as well!

*I labeled my desk drawers and slots, so that my children could easily find what they were looking for...this included printer paper, tablet paper for notes, card stock paper, projects etc.


*All of the card stock, craft paper and scrapping paper was filed under color.  Can I tell you HOW great this is for little kids who like to "paw" through stacks and stacks of paper looking for the right color?  This saved me a lot of time and paper clean up.  It also eliminated paper that was ruined because it got squished in the bottom of the pile.


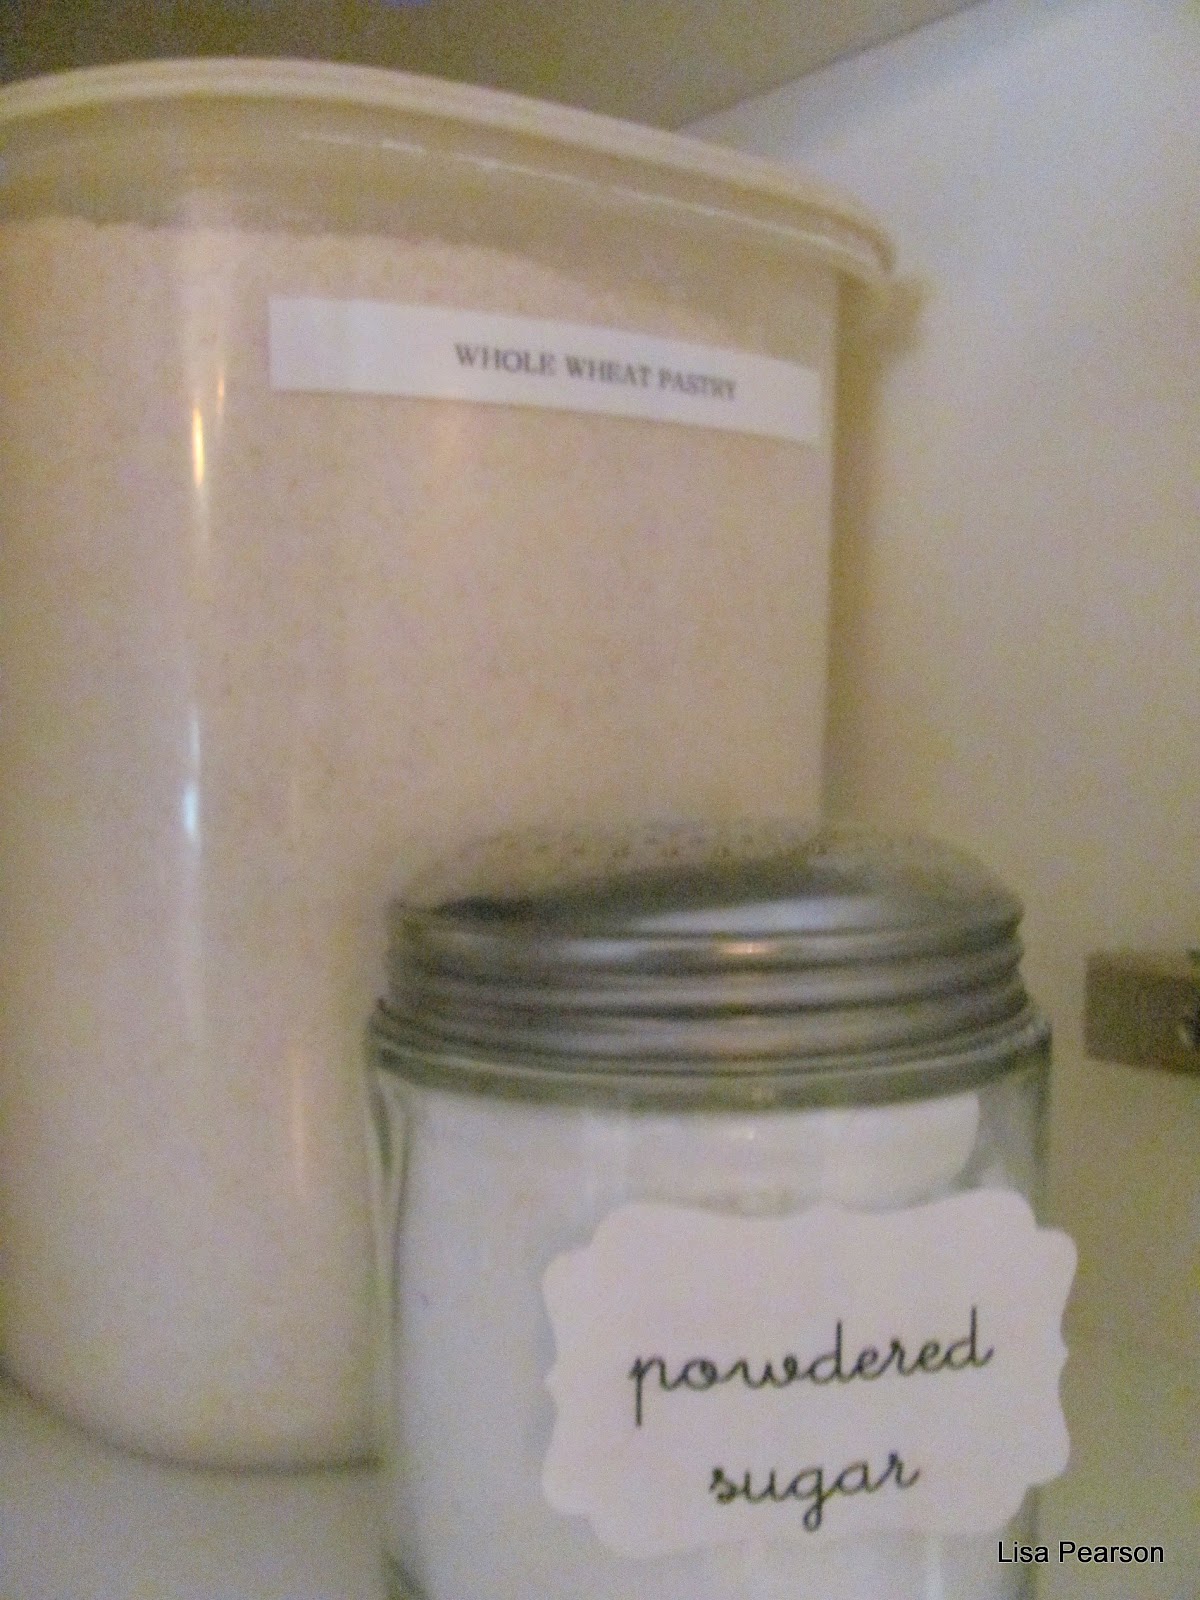
*When you are teaching your children to cook and all the flour looks the same...it may be a good thing to label.  It may save you a few dinners from being TOSSED or choked down!


*The wine rack was taken out of the hutch and replaced with a KID-FRIENDLY, less-dust collecting, picnicy-looking basket and a "fizzy drink" label...it has our very favorite fizzy, sparkling lemonade in it!


 *Labeled binders...AWESOME!!!


*There is no need to label everything, but I like how it adds a bit of charm as you walk in the front door!


 *The baker's twine has been on for a few years and I am replacing some of it with old-fashioned parcel twine for something new and fun!


*Everyday napkins and paper food trays are kept in the kitchen island.  This also is convenient for late night snacks and a quick lunch-on-the-go!

 *The linen closet was labeled so that when our children put the laundry away...there was no question as to where the towels, hand towels and other linens belonged.  Again, a small home can quickly fill cluttered or feel cramped if the space is not used wisely.  EVERY inch is PRIME REAL ESTATE {thank you, Paula!}

 *When our daughter moved home from college, we replaced her name with the letters HOME.  Since I could not for the life of me get them to hang straight, I decided to glue gun them to her headboard!  It looks so inviting and cozy!
 *These baskets are on both sides of our bed.  One on hubby's bedside stand and one on mine.  No need to know what is in the baskets...but since a master bedrooms can always use a bit of  ZIP, I thought it would be a fun addition to the book baskets!  NO computers, electric cords, or JUNK allowed!!  :}
 
 *Our master bathroom was all white and a bit sterile-looking.  Simple tags were added.  I love how they made our HOTEL-LOOKING bathroom now looks like it is in a HOME...along with the toothpaste stuck to the sink...the kid's toothbrushes {I have no idea why they like to brush their teeth in our bathroom???} saline solution, and eye drops!

 *Even though the containers are clear, it is much more convenient to see at a glance what is what.  These craft closets were once open bookshelves.  My hubby and fil decided to close them up.  They were able to double the space by knocking out the backs of the bookshelves to the actual outside of the house.  It was an inexpensive project...alot of bang for the buckaroo!


*We can't forget little fuzzy fur feet...our dog food is conveniently stored in a large glass container under the kitchen sink.


 *THIS is by far my favorite label...the kiddies used a ton of label tape one night labeling for fun...but every time I sit down to my desk it makes me SMILE!  It is old and dirty...but I have no plans of moving it or making a new one!  Their sneaky little smiles and pride of what they had made for me are forever embedded in my heart...

Enjoy your day, my sweet readers!


Shared with:  bowl of lemons, the inspired room

Party in a Tub


Okay, girls. This should have been blogged about long ago. I really try to think ahead as much as possible to things that I know I can work on that tend to "stress me out".

One thing that could really overwhelm me was trying to pull off a last-minute celebration. Maybe it isn't a big deal for you and if that is the case, I am insanely jealous of YOU! You should be writing this! Anyhoo, I tend to make a big deal out of things that should be kept simple.

Wanting to go over the top is not always an option. It could be a finances, time, lack of energy or just LIFE in general that can keep us from celebrating life’s milestones. I know there have been times when I wished I would have been able to keep things simple without the guilt and there have also been times where quite honestly…the thought of lighting tea light was too much to think of.

Several years ago, I had an extra tub floating around in our garage and I decided right there and then that not everything has to be done with weeks of planning. Especially now with PINTEREST, one can feel very intimidated by parties that are “pulled together” in hours!

All you need to do is this: collect a few things that can be used for a last minute party. It can be whatever you like. Just keep it simple, easy to get to and remember to replace the things that you may start to run low on.

I do keep quite a few of these things in other areas in our home, but it is much easier to grab one container that has everything you need in ONE place. Be sure to include a click-lighter because if your home is anything like ours…all of them will have disappeared when it comes to lighting the candles!

AND if you are simply not up to this project now, it may be something you can start collecting for in the spring when the sun is shining and you have a bit more energy!

One more thing...if all else fails…dim the lights, listen to your favorite music and have someone else light the candles for you…and enjoy the gift of LIFE!

Here are a few things I like to keep in the "PARTY IN A TUB"


The "welcome sign" is a new addition. The ribbon can be replaced with twine or any other ribbon you may want to use. Just another simple touch!
I have found my plain white frames to be amongst my favorite! You can write or stamp a message on a piece of paper or even frame a birthday card and it just makes such a BIG statement...a simple "congratulations" can convey a special message! You can even write on the glass with chalk pens if you like! They can be embellished and used for big party bashes, too! Goodwill always has great frames and the dollar store sometimes carries them two for $1. {That is where I bought the smaller frame that has the birdie picture in it!}
Our "Party in a Tub" is housed in the garage!!
Hope this helps you!
HAPPY HAPPY FRIDAY!

Shared with:  a bowl full of lemons, pink saturday

Thursday, February 9, 2012

Mini Crepes and Whipped Cream


This would be a fun dessert, don't you think? What about breakfast in bed? Not much more indulgent than THAT!

*All you need to do is make up your crepes using a favorite recipe.

*Use a scalloped cookie cutter {available at Sur la Table} and cut out rounds.

*Dice up fresh strawberries into teeny, tiny, itty, bitty, pieces and coat with a bit o' sugar and fresh lemon juice.

*Fill mini crepes with berries and roll up a bit.

*Serve these sweet little crepes with a small dish of fluffy whipped cream.

Don't forget to sprinkle powdered sugar on top of rolled crepes before serving. It's like a dusting of snow!! Speaking of SNOW, I am ready for SPRING! And I know that a few of you have had your share of snow and are looking forward to sunshine and gardening!

Happy Thursday!